Lying is awesome. From a very young age, children learn that flat out denying the truth gets you out of trouble and helps keep you calm in the face of horror. But what happens when you just have to know if someone, say, used your toothbrush? You could ask them to take an expensive and arduouspolygraph test.
If you're industrious and don't have the dough for a legit polygraph, you can make your very own galvanic skin response (GSR) device. These devices are one of many connected to a real polygraph machine. The GSR device measures the conductance of your skin. When you are nervous, under stress or in pain, your skin sweats very slightly, thereby increasing the conductivity.
Today, we will make a cheap GSR device and learn if our toothbrush is really safe after all.
Materials
- Arduino
- Aluminum foil
- Velcro
- Wire
- 10k resistor
- Breadboard
Step 1 Make the Electrodes
GSR machines require an even and consistent connection to the skin in order to function properly. To keep surface area and pressure constant, we will make tin foil electrodes to wrap around two fingers of the interrogated.
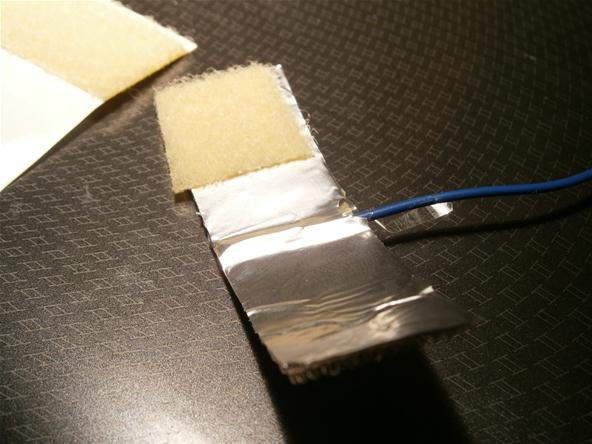
Begin by taping the exposed end of a wires to a sheet of foil.

Adhere a strip of Velcro over the tape and cut off the extra foil.

Last, add a single piece of Velcro at the end of the foil side. Be sure you are using the right side of the Velcro sheet.
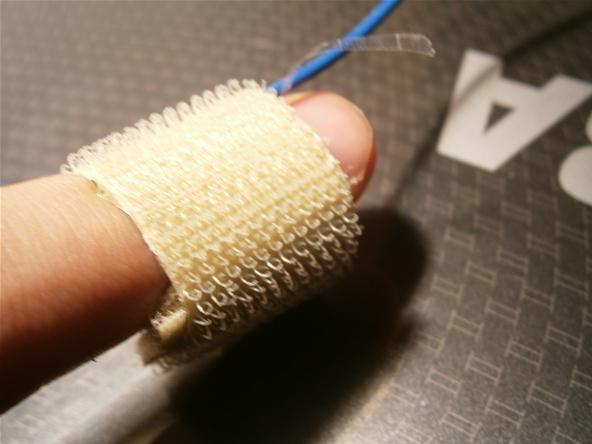
Now you have an electrode that wraps perfectly around your finger.
Step 2 Wire the Circuit
Wire the circuit according to the diagram below. We are essentially making the finger electrodes into an analog input. The grey wires represent the finger contacts. The resistor has a value of 10k ohms.
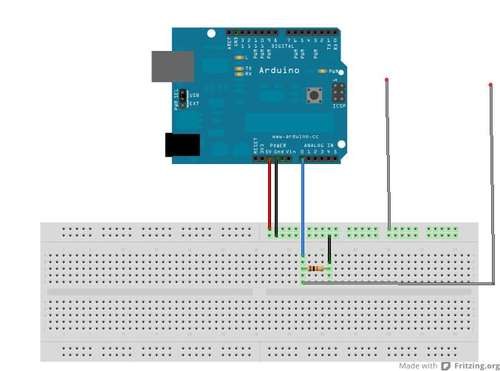
Take note that the sensors are connected to analog input 0 on the Arduino.
Step 3 Load the Code
We can just use the example "Graph" code that comes with the Arduino software. Navigate to File>Examples>Communication>Graph. This program takes the analog values coming from the skin and sends them to be graphed so we can see them change over time. Load the code onto the Arduino and put on the finger electrodes.
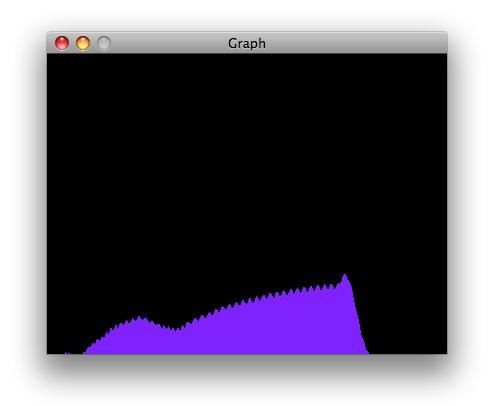
If you do not have the Processing application, it is free to download here. Copy and paste the processing code from the Arduino example into the processing application. The processing window should look familiar as the Arduino application is based off of it. Run the processing program. A graph should pop up. The height of the graph line represents the conductivity of your skin. The higher the line, the higher the conductivity, the higher likelihood that you are lying.
Please note that this device is by no means foolproof. Anything could make the subject nervous and sweat more. Do not use this device for life and death decisions!
Now we can interrogate anyone! Well, anyone we can convince to sit down and put these strange electrodes on their fingers. What would you do with this device? What uncertainties are nagging at you? If you try out this project, be sure to post up pictures and video on the corkboard. As always, any questions can be posted in the forum or sent to me directly
No comments:
Post a Comment